Friday, January 8, 2010

Razer Imperator mini review


Introduction
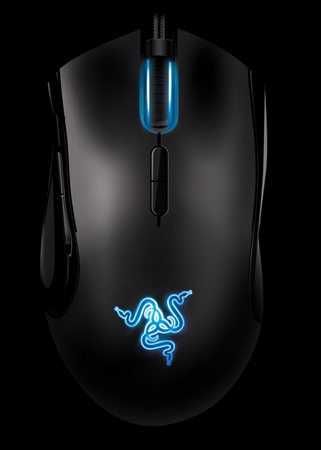
Razer Imperator is Razer.Inc latest mouse to be introduced to the market , the mouse is ergonomically design for right-handed mouse users and purpose is to provide comfort for long sessions of gaming and usage . with a $80 price tag , Razer Imperator is positioned between the more-expensive Razer Mamba with its wireless feature and Razer Death Adder which is favourite among users .


Reason to purchase

So far I have owned three mouse , the first is Logitech MX-Revolution and then after it proved to be ineffective in FPS games due to its weight , I bought my first wired mouse which is Razer Lachesis . but just after four months of using it , I felt Lachesis didn’t gave me the same feel as my MX Revolution so I look for another mouse . some mouse that get into my consideration are Sidewinder X8 , Roccat Kone , Death Adder and CMStorm Sentinel , but recently I heard about a new mouse from Razer, and after few weeks of considering the options . I decided to give a shot on Razer Imperator

Service
Before deciding to go for Imperator ( im pretty sure that the next mouse would be Razer ) i do stumble upon Razer Naga . both have ergonomic design and i was thinking about going for naga instead because it has more buttons .
being in a dilemma , i consult the Sales Representative through Live Chat.
the sales representative answered my questions very well regarding the functions of each mouse and it seems that she had quite a knowledge of razer products , asking me what is my preference for a mouse and suggesting the best mouse that suits me .
the conversation lasts about half an hour and i had lots of doubts cleared , i give a thumb for the professional service the sales rep gave to me .
lastly , before i end the conversation she said she will give me a bonus Razer L33T pack if i made my purchase , i consider this as a value added service.
three days after i made my order , the mouse was already reached the nearest post office in my neighbour and salute to Razer for their prompt service and fast delivery .

Design

The mouse , which is designed like kidney shape actually looked a bit like my MX-Revolution . both , do have curve that goes inside to accommodate the thumb . while MX look roundy on its overall shape, Imperator look a bit oval and longer (length ) than MX but it is not , instead Imperator is shorter by 1-3cm
For the ergonomics , I do feel a difference switching from my Lachesis which is ambidexterous mouse as it is design for righty-palm gripper such as me . the size of the mouse is big enough for my palm to rest . and it fits perfectly . although the mouse looks small for some those who compare it to Death Adder but they actually have quite the same size but DA have wider fronts(left and right click tips) and ends which makes it look bigger than Imperator

Weights around the same as lachesis , it glides easily with just light touch . I don’t have any preference for mouse actually , but a mouse which is targeted for FPS games should be light enough to be easily moved , but heavy enough for a user not to move it accidentally . but again it boils down to the user , some prefer a heavier mouse and user more effort to move it but some prefer lighter mouse which glides with just a little effort


Some Comparison Pictures with my MX Revolution
[IMG]http://i92.photobucket.com/albums/l23/davidcokro/imperator/DSC00125.jpg[/]
[IMG]http://i92.photobucket.com/albums/l23/davidcokro/imperator/DSC00126.jpg[/]

[B][U][CENTER]Features[/CENTER][/U][/B]

Razer imperator have a special feature which is the ability to switch the thumb buttons to five different positions , forward and backwards . this feature enables the user to position the thumb buttons to his / her preference as he/she see it fit and comfortable to reach both thumb buttons . I have quite a small hand , but long fingers yet I felt that setting the thumb buttons to the most right gives me the best position to reach both buttons.
Another feature which is drift control enables the mouse cursor to move exactly according to the mouse movement , I haven’t explore this feature because there are no tool to test this . and while I am using this mouse I did not notice any difference at all .
Other features such as 3.5G 5600DPI sensor , and braided cable which provide more durability than the previous rubber cable found in old razer products

[B][U][CENTER]Razer Configurator[/CENTER][/U][/B]

Razer Imperator UI contains most features that a gaming mouse have such as customizable buttons , DPI configurator , saving profiles , macros , lights and updates . Compare to my razer lachesis UI , Imperator UI is much bigger and more user friendly than Lachesis UI
[IMG]http://i92.photobucket.com/albums/l23/davidcokro/imperator/ui.jpg[/IMG]

[B][U][CENTER]Updates[/CENTER][/U][/B]

Recently Razer imperator released a new firmware to fix the lights and other issue . after firmware update there are no noticeable difference , but it took longer time for the razer configurator to detect the synapse memory .

[B][U][CENTER]Conclusion[/CENTER][/U][/B]

Razer Imperator is a mouse that caters toward users who are looking for an ergonomic and specially cater for right handed users , the design of the mouse gives a good feel most palm grippers will love this as it has quite a similiar form factor as razer death adder

Pros :
- Nice form factor , suits perfectly for palm grippers
- thumb buttons can be positioned to suit user preference

Cons :
- Pricey , $20 difference compare to DA


theres some interesting things about this purchase :D

before i make my order , i do chat with the sales representative . and she said to include the razer l33t pack onto the purchase ... i know this is not much ... but .. well heres the picture of whats inside :D
[IMG]http://i92.photobucket.com/albums/l23/davidcokro/imperator/DSC00120.jpg[/IMG]

and also , it seems like razer loves to have their customers adverstise their products...and...yes...this works ....much effective ... as i thought...
heres the image...and ...you can imagine bringing this thing from post office back to house :D
[IMG]http://i92.photobucket.com/albums/l23/davidcokro/imperator/DSC00122.jpg[/IMG]

Wednesday, December 16, 2009

[SOLD] Razer Lachesis

I am selling my Razer Lachesis


bought on27th August 2009 (so , less than 3 months from the date this was posted
conditionrefer to photos provided , no scratches
price$85
reason for sellingdidnt do much fps gaming , so decide to sell it
if you bought it for $85 , ill throw in the razer exact rest for free

interested parties , email : davidcokro_12@hotmail.com

New Media Problem 10 HTML (HOW TO) (PART 3)

Continue From part 2

FOR THOSE WHO HAVENT READ PART 2 ARE ADVISED TO CLICK HERE


FORMS


in this section , we gonna learn how to create forms , used in survey , close ended , open ended half-closed , half-open , whatever ~
<form>
this is where your code will go
</form>
same as what you do for HTML BODY , between opening and closing put an empty space so later you can fill it

inside the forms , you have "input elements" which code looks like this
<form>
<input type="zzz" zzz zzz zzz/>
</form>

there are several types of input elements :
1.text fields ,example of
<form>
First Name : <input type="text" name="firstname"/>
</form>

First Name :

2.Buttons , example
<form>
<input type="radio" name="sex" value="GUY"/> GUY
<input type="radio" name="sex" value="GAY"/> GAY
</form>

GUY
GAY

3.Checkboxes , example
<form>
Gadgets you own
Ipod : <input type="checkbox" name="gadget" value="ipod" />
Zune : <input type="checkbox" name="gadget" value="zune" />
Both : <input type="checkbox" name="gadget" value="both" />
</form>

Gadgets you own
Ipod :
Zune :
Both :

4.Drop down menu , example
<form action="">
<select name="cars">
<option value="volvo">Volvo</option>
<option value="saab">Saab</option>
<option value="fiat">Fiat</option>
<option value="audi">Audi</option>
</select>
</form>


5.Submit the form
<form name="input" action="html_form_submit.asp" method="get">
Username:
<input type="text" name="user" />
<input type="submit" value="Submit" />
</form>

Username:


note that , the submit button we learn in this phase is nothing more than a display ... in order to learn how to gather ALL the data in a form , will be learned in the future advanced coding and is irrelevant to the current lesson


another thing that you should notice is
<form>
<input type="radio" name="sex" value="GUY"/> GUY
<input type="radio" name="sex" value="GAY""/> GAY
</form>
the word marked in red does not determine the name of the options...same goes to text fields , and checkboxes .

everything(value , name , etc) inside the INPUT ELEMENT is NOT BE DISPLAYED when you open the webpage , the ones which determine is no other than the word coloured in yellow which is a simple paragraph text.
example , this is buttons without YELLOW WORD


as you can see , the buttons didnt have any title , so the reader dont know which one to choose

EMBED


this is the final yet the easiest part of all , embeds ... as you have know are long long codes that makes your blog , website , etc looks nice ...
usually embed code are created by the provider , such as this :

<object width="425" height="344"><param name="movie" value="http://www.youtube.com/v/oHg5SJYRHA0&hl=en_US&fs=1&"></param><param name="allowFullScreen" value="true"></param><param name="allowscriptaccess" value="always"></param><embed src="http://www.youtube.com/v/oHg5SJYRHA0&hl=en_US&fs=1&" type="application/x-shockwave-flash" allowscriptaccess="always" allowfullscreen="true" width="425" height="344"></embed></object>

this looks...MESSY , HUGE , COMPLICATED .... etc
and this is the result


dont blame me if i had a bad taste of music , its just an example ... continue ..
embed codes need not to be modified as they are super-user-friendly , you just need to copy paste the chunk of code , and thats it! it will show up exactly what you wanted .

so , with this paragraph i finish my guide for PROBLEM 10 NEW MEDIA HTML GUIDE , thanks for all readers who read this until the end , hope you can have better understanding of the subject and see you next year !! 2010 :D

Saturday, December 12, 2009

New Media Problem 10 HTML (HOW TO) (PART 2)

Continue From part 1

FOR THOSE WHO HAVENT READ PART 1 ARE ADVISED TO CLICK HERE


PARAGRAPH


on this section , we will talk more about paragraph , creating lines , and breaks

SIMPLE PARAGRAPH

<p>word</p>
simple code to write a paragraph , basically when you want to type a paragraph all you need is to make <p> , type type type and close with </p> , thats all :D

BREAKS

<br /> remember there is a spacing between br and /
break the sentence , act as enter in this case . example :
<p>this is my first sentence<br />this is my second sentence</p>
will result in :

this is my first sentence
this is my second sentence


LINES

<hr /> remember there is a spacing between hr and /
hr is a line , yep a simple line . example :
<p>this is my first sentence<hr />this is my second sentence</p>
will result in

this is my first sentence


this is my second sentence

HEADINGS

headings , ranged from 1(biggest) to 6(smallest) in terms of size . it works the same as paragraph(<p>word</p>) , lets try couple examples for easy understanding .

this is font size used in paragraph for comparison

CODE EXAMPLE RESULTS
<h1>word</h1>

word

<h2>word</h2>

smaller word

<h4>word</h4>

even smaller word

<h6>word</h6>
smallest word

TEXT FORMATTING

you might get used to press B for bold and I for italic (or other text formatting) but dont know what code that modifies it , this part will explain all you need to know .

CODERESULTS
<b>WORD</b> BOLDED WORD
<i>WORD</i> ITALIC WORD
<s>WORD</s> OR <strike>WORD</strike> STRIKED WORD
<u>WORD</u> UNDERLINED WORD
<sub>WORD</sub> SUBSCRIPTED WORD
<sup>WORD</sup> SUPERSCRIPTED WORD

there are lots of things you can explore on W3SCHOOLS formatting part but so far this is all needed to tackle P10 problem


STYLE


style are modifier for....most things that you could have imagine , it changes font size , font type , font color , etc .

usually style are located after an element , examples : <b style="~~~">text</b>
can also put styles on paragraphs , headings , etc

TO MODIFYCODERESULTS
FONT COLOR <p style="color:red">text</p>

this is a paragraph with red font color

BACKGROUND COLOR <p style="background-color:yellow">text</p>

this is paragraph with yellow background color

TEXT SIZE <p style="font-size:25px">word</p>

this word size is 25px


or maybe both , using combine method , example : <p style="background-color:yellow ; color:red">word</p>

this is paragraph with yellow background color and red text


if you want to check list of colors you can use , try this link to W3SCHOOLS , you dont need to remember the codes , just the exact name of the color and there you go..try experiment with some colors =D


COMMENTS

<! comment>
comments are instructions or descriptions inside the code that will not be shown/displayed when you open your HTML webpage , its main purpose is to improve code readability and understanding for those other than the author(creator)
sometimes people create messy codes , but with comments other people who read it can know whats the purpose of this part of code , etc

type this sentence below in your notepad++ and see if it is actually displayed or not in the browser(remember to replace < > with < >)
<! THIS IS A COMMENT>

LINK TO PART III

Friday, December 11, 2009

New Media Problem 10 HTML (HOW TO)

Hi readers , this is my 3rd post and this time i will write a guide on how to create a website so maybe you can have better understanding of the problem since this problem will be tested on UT2 january 2010
i assume that you have a software(notepad++) and all p10 resource to begin with

lets start with the basics , MANY html code(or what we call as "ELEMENTS") have two parts , first is "opening" and the second is "closing" . basically what you have "opened" must be "closed" , because it is not an automatic close door like those in RP entrance or 3rd floor canteen .

you might wondered hey i didnt close the code yet it displayed in my firefox / opera nicely =DDD . ok in this case the browser correct the mistakes for you , but Internet Explorer might not show your designed web page properly . so keep in mind on that


example on opening :
<u> or <b> or <p>
example on closing :
</u> or </b> or </p>

the basics are over! lets start with the real thing =D (yeah , yeah , this sucks more than it looks )


to start coding html , you need to tell the computer that THIS is an html file so when the computer reads your code it will said "oh ok this is HTML file and load it up"

type < html > and then < /html > on the 3rd line leaving a blank space in the middle , you will be filling up the empty space with your codes ( LOTS OF IT )

html have head and body part, metaphorically it is almost the same as human except you can modify the contents of head and body while humans not

<head> contains codes that will not be shown up , such as title , layout etc , example :
<href="WebsiteStyle.css" rel="stylesheet" type="text/css"> 
<title>HOME</title>

<body> contacts codes that if you put it will show up on the blog , example :
<img src="Website Resources\TopBanner.jpg"/>
</br> 

in the next part i will explain some common codes ( elements ) used in HTML.

TITLE


<title>name of title</title> usage of title is to display the name of your webpage

Photobucket


inside the circles are title of your webpage , the reason of using title is that to get visitor / readers to know they are in the right place / website . if there is no title the webpage will simply show UNTITLED which is not quite good for user friendliness.

LINK


<a href="~zzz~">name of link</a> replace ~zzz~ with a website address such as http://www.google.com
this element is called a LINK , the function is of course to link to a certain website when you click it , example
this link goes to google
remember to put the complete domain/website name (http:// include) inside the href

IMAGE


<img src="xxxx"/> replace the xxxx with your image source but leave the " " mark intact
to put image on your webpage , you can have internal ( inside your computer ) and external (outside your computer such as image from a certain website ) source

examples of internal source image :
<img src="Website Resources\geisha1.jpg"/>

note that for internal source , image must be in the same folder as the HTML file OR in the sub folder of the HTML file . in this case my image source is in the subfolder of the location of HTML file

examples of external source image :
<img src="http://www.w3schools.com/tags/angry.gif"/>

most browser supports many types of images such as JPEG , JPG , GIF , SVG , PNG etc

the element : <img src="xxxx"/> actually can be further modified.
such as link to specific website when clicked , photo tagging , changing the size of the photo
lets start with this "smiley"
i use external link for this one : http://www.w3schools.com/tags/angry.gif

ADDITIONAL ATTRIBUTES

1.alternate text


sometimes , a photo might failed to load when you open certain website , so in this case alternate text is needed to inform the reader what kind of image is it
<img src="xxxx" alt="tagx"/> replace tagx with any word

2.resizing photos


there are two attributes , height and width that is modifiable
to change the size simply height="size" or width="size" , also it is possible to alter both , example :
height
<img src="http://www.w3schools.com/tags/angry.gif" height="size"/>
width
<img src="http://www.w3schools.com/tags/angry.gif" width="size"/>
both
<img src="http://www.w3schools.com/tags/angry.gif" height="size" width="size"/>
note that your can enter the SIZE as exact value such as 100(means 100 pixels) or 100% (percentage of the original image size )

remember to put src first , then continue to add the attributes , it doesnt work other way around

3.image links(clickable image that links to certain website)


this method is quite common in website since people prefer to click on images rather than , say "hey click here!" (useful when you need to attract readers to click the link) . below is the google image that will link to http://www.google.com

so..how does it work? the steps are quite simple all you need is to combine image with link element
IMAGE LINK
<img src="http://iduniversity.files.wordpress.com/2009/08/google.jpg"/>
WEBSITE LINK
<a href="http://www.google.com">leave this space blank</a>
COMBINEinsert image into middle of website link , image attributes such as resize also works
<a href="http://www.google.com"><img src="http://iduniversity.files.wordpress.com/2009/08/google.jpg"/></a>

CONTINUE TO PART II

Wednesday, December 9, 2009

7-zip (HOW TO)

[CREDIT GOES TO 7-ZIP Author IGOR PAVLOV]
You might wonder , why i cant open a ZIP file sent by your friend ... but now , worry not :)

This is the first post , instruction on how to use 7-zip , a free yet powerful software to open ZIP , TAR , RAR , and its own file extension 7Z

you can download it HERE and for 64-BIT Windows users download HERE
(if you dont know which one to download just click the former part)

the steps are quite simple ... install it , and thats all :)
(if you dont know how to install just double click the file downloaded and press NEXT all along the way)
below picture is an example of zip file
Photobucket

1st post

so , this blog is created ... but this time the blog caters for those who are interested in IT stuff ...
whether you are beginners who are looking for clues to solve simple problems on your computer or intermediate users who are curious.
welcome welcome =D